Hey everyone! If you’re running a textile plant, you know a sizing machine is basically the backbone of your weaving department. I’ve been in the sizing machine game for over a decade now, talking to plant managers every single week who are frustrated because their machines aren’t cranking out as much as they should. Today, I’m pulling back the curtain on real, actionable stuff—no corporate jargon, no vague tips that sound like they came from a textbook written by someone who’s never actually stood next to a running sizing machine. Let’s dive into how you can actually boost your sizing machine’s productivity, and yeah, I’ll frame this from where I stand: as a supplier who’s not just selling machines, but fixing the headaches I hear from you guys. Sizing Machine

First off, let’s get one thing straight—productivity here isn’t just about running the machine faster. That’s a surefire way to get more breaks in the warp yarn, more waste, and a machine that breaks down a week later. It’s about consistent, smooth runs with as few stops as possible, less waste per batch, and your team not scrambling at 3 AM to fix a preventable issue. I’ve seen so many plants skip the small daily checks and then wonder why their line goes down for 2 hours at the worst time.
Let’s start with the stuff you can control every single day: machine setup and pre-run checks. I know it sounds tedious, but I’ve watched a plant skip checking the tension rollers one morning, and by mid-shift, half the warp was stretched unevenly, leading to 12 ends breaking mid-sizing. What’s the fix? A 10-minute pre-run checklist tailored to your machine, not some generic sheet. For example, if you have a modern sizing machine with servo-driven tensioners, don’t just rely on the digital readout—do a manual spot check on 5 random yarn ends to make sure the tension is consistent across the entire warp beam. Old-school machines still need that too; I’ve found that rubber tension rollers wear out faster than people think, so swapping them every 6 months (not when they’re completely smooth) makes a huge difference. Another quick win: cleaning the yarn guides. Lint and dried sizing buildup on guides cause more yarn breaks than any other small issue. I tell all my clients to keep a lint roller and a small wire brush right next to the machine—1 minute of wiping each guide before starting your shift adds up to way less downtime.
Next up, the sizing recipe. This is where a lot of plants miss the mark, and honestly, it’s not their fault. A lot of generic sizing recipes online or from old books are outdated, and they lead to over-sizing (which makes yarn stiff, breaks easier) or under-sizing (which leaves yarn prone to pilling and breaks during weaving). As a supplier, we work with clients to tweak their recipes for their specific yarn and machine, but even if you’re not buying our machines, here’s a pro tip: test a small batch of yarn with a 5% lower starch content than your usual recipe first. If the yarn still has enough sizing to last through the weaving process, you cut down on drying time (so you can run the machine a bit faster) and use less sizing material, which saves money too. I once worked with a small plant that was using a recipe with 35% starch; we dropped it to 28% after testing, and their run length went up by 18% because there were so fewer yarn breaks. That’s the kind of win that makes your whole week. Don’t be afraid to test small—you don’t have to retool your entire process at once.
Drying is another big one. So many machines are set to blast heat as high as possible to dry yarn fast, but that causes the outer layer of sizing to harden before the inner moisture is gone. The result? Sticky yarn that clogs the machine’s drying cylinders, or yarn that’s still damp in the middle, leading to breaks later. Modern sizing machines have temperature zones for drying, and if you’re on an older machine, you can adjust your air flow instead of cranking up the heat. I recommend a gradual temperature ramp-up: start at 100°F for the first third of the drying section, bump to 140°F for the middle, and drop to 120°F at the end to cool the yarn before it winds onto the weaver’s beam. That way, moisture evaporates evenly, no sticky buildup on cylinders, and less waste. I also suggest cleaning the drying cylinders every 2 weeks—old dried sizing flaks off and gets on yarn, causing breaks. It’s a 20-minute job, and I’ve seen clients cut drying-related downtime by 30% just from that.
Wait, let’s talk about your weaver’s beam winding process, because a lot of people forget that sizing doesn’t end when the yarn comes out of the drying section. If you’re winding the sized yarn too tight on the beam, it’s hard to pull off during weaving, leading to tension issues and breaks. If you wind it too loose, the beam shifts, and yarn tangles. As a supplier, we optimize the winding speed and tension settings on our machines specifically for the weaver’s beams our clients use, but even if you’re not using ours, here’s a quick trick: use a tension meter on the winding roller. Set it to 8-10 grams per denier for most cotton yarn, adjust for synthetic blends. I’ve had clients tell me this simple tweak cut their beam changes by 10% and their weave room breaks by nearly 15%. No extra equipment, just a $20 tool that pays for itself in a week.
Now, let’s get into machine maintenance—this isn’t just “call the tech when it breaks.” Preventive maintenance is where you save the most time and money. I see so many plants waiting until a bearing seizes up before fixing it, which leads to a 4-hour downtime and a $500 bearing part, instead of greasing the bearings every 3 months (a 30-minute job) for $20 worth of grease. For modern sizing machines, the PLC (the brain of the machine) needs regular updates, too. A lot of clients skip updates because they think it’s a hassle, but I’ve seen outdated PLCs cause inconsistent tension and speed issues that lead to more breaks. We send free update tutorials to all our clients, and it takes less than an hour—no need for a tech to come out for that. Also, don’t forget the transport rolls and guide rollers on the machine. Worn rollers cause yarn to shift, which leads to uneven sizing. I tell my clients to inspect these rollers every month, and replace any that have flat spots or rough edges—another quick fix that prevents big problems.
What about your team? Let’s be real, a machine is only as good as the people running it. I’ve trained operators who are just following a script, not noticing small issues like a lint build-up or a slightly misaligned guide that’s causing 2-3 breaks per batch. Give your operators 10 minutes at the start of every shift to walk the machine and flag issues—they’re the ones working with it every day, so they know when something’s off. Also, cross-train at least 2-3 people per shift to run the sizing machine. If your only operator calls in sick, you’re stuck with a half-trained person who takes twice as long to set up the machine, leading to delays. I’ve seen plants with cross-trained teams cut setup time by 25% and reduce unplanned downtime by 20% because no one person is a bottleneck.
Wait, let’s address common mistakes I hear all the time. One big one: running the machine at maximum speed right out of the gate. New operators especially want to see how fast the machine can go, but it takes time for the warp to settle into the machine. Start at 60-70% of your target speed for the first batch, let it run for 15 minutes, check tension and sizing, then bump up 5% at a time. That way, you avoid those early breaks that waste yarn and time. Another mistake: overloading the warp beam. If you cram too much yarn onto a beam, it’s heavier, puts more stress on the machine’s bearings, and the tension gets uneven across the beam. I recommend loading beams to 80-85% of their maximum capacity—you’ll get slightly more beams total, but each one runs more consistently, and you’ll have fewer beam changes, which is a huge productivity win. Changing a beam takes 10 minutes, and if you do that 3 times a day instead of 5, that’s 20 extra minutes of running time every shift.
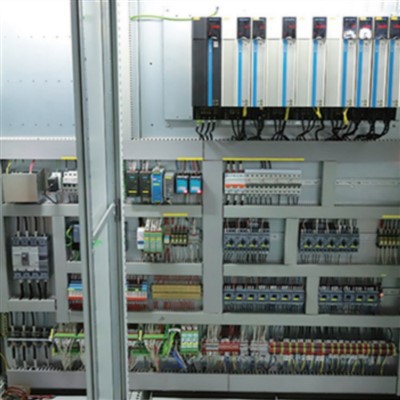
Now, I’m gonna be straight with you here: as a sizing machine supplier, I don’t just want to sell you a new machine— I want you to make the most of the one you have, because a happy client is the best client. If you’ve done all these small tweaks and you’re still hitting a wall, that’s when a new machine (or an upgrade to your current one) makes sense. Modern sizing machines have things like automated tension adjustment, real-time yarn break detection, and automated cleaning systems that take a lot of the guesswork out of it. For example, our latest machines have sensors that stop the machine the second a yarn breaks, instead of letting it run for 10 minutes and wasting half the batch. That alone can boost productivity by 10-15% for plants running high-volume batches.
But here’s the thing: you don’t have to buy a whole new machine to see results. Most of the tips I’ve shared today cost almost nothing—10 minutes of pre-run checks, a tension meter, some grease, a lint roller. I’ve had small textile plants go from 100 beams a week to 130 beams a week just by implementing these steps, without working their team harder or spending a ton of money.
If you’re tired of dealing with unexpected downtime, too many yarn breaks, and constant headaches from your sizing machine, reach out. We don’t do one-size-fits-all solutions—we’ll look at your current setup, walk your floor, and figure out exactly what tweaks or upgrades will work for your plant, not just push a machine. Whether you need help optimizing your recipe, training your team, or checking if your machine is due for a service, we’re here to help you get more out of your sizing machine. No sales pitch, no pressure—just actual solutions from someone who’s been in this game long enough to know what works.
So that’s the real talk on boosting sizing machine productivity. It’s not about running faster—it’s about running smarter, taking care of the small stuff, and leveraging the tools and expertise that are out there. If you’ve tried any of these tips and had luck, drop a comment below, and if you’ve got a question about your specific setup, feel free to reach out. We’re here to help.
Sizing Machine References
- Textile Machinery Maintenance Handbook, 5th Edition, International Textile Manufacturers Federation, 2022
- "Optimizing Sizing Processes for Small-Scale Textile Operations", Journal of Textile and Apparel Technology and Management, Vol. 12, No. 3, 2021
- Sizing Machine Performance Metrics: A Practical Guide, Global Textile Suppliers Association, 2023
- Yarn Tension Control in Sizing: Best Practices for Reducing Breakage, Textile Productivity Journal, Vol. 18, No. 2, 2022
Jiangsu Huanqiu Jingtian Machinery Co., Ltd.
As one of the most professional sizing machine manufacturers and suppliers in China, we are able to meet the needs of the majority of our customers. Please feel free to buy high quality sizing machine made in China here from our factory. Contact us for more details.
Address: No.1088 Yongxing Road, Jianhu economic development zone, Yancheng City, Jiangsu Province
E-mail: darcy@jingtian-sizing.com
WebSite: https://www.cnhqjtjx.com/
