Hey everyone, thanks for popping in! If you’ve ever dabbled in woodworking—whether you’re building a shelf for your tiny apartment, fixing a wobbly chair leg, or working on a bigger project like a deck—you know how tricky it can be to get strong, long-lasting connections that don’t crack, slip, or look like a hot mess. I’ve been in the rivet game for over a decade now (I’m a rivet supplier, duh), and let me tell you, wood and rivets are a match made in heaven—if you do ’em right. A lot of folks sleep on rivets for wood, writing ’em off as just for metal, but nah—when used the right way, they’re way more reliable than nails or screws for certain jobs, no fancy tools required half the time. Let’s break this down, no boring jargon, just what I’ve learned from shipping rivets to woodworkers, contractors, and weekend DIYers all over the place. Rivet
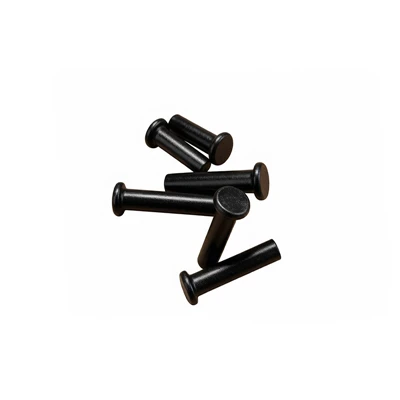
First off, why even use rivets in wood vs. the usual suspects? Nails bend, screws strip out over time especially if you’re drilling into end grain, and glue alone can fail if you’re putting a lot of stress on a joint. Rivets? They create a tight, permanent, shear-resistant connection that doesn’t loosen with humidity shifts (wood swells and shrinks, we’ll get to that in a sec) and holds way more weight than you’d think. I once sold a pallet of our 1/4” aluminum rivets to a guy who builds custom outdoor picnic tables—he told me his tables don’t wobble even after 5 years of rain, sun, and people plopping heavy plates on ’em. That’s the stuff we’re after.
Now, before you grab the first rivet off my shelf (or any shelf, tbh), you gotta nail down the basics: choosing the right rivet type, size, and material for your wood project. This is where most people mess up, so pay attention. Let’s start with materials. Most wood projects don’t need stainless steel rivets (those are for marine stuff, way more expensive) unless you’re building something that’s gonna get submerged or sit in salt air. For regular indoor or covered outdoor projects—like bookshelves, cabinets, or deck railings—aluminum rivets are your go-to. They’re cheap, light, don’t rust, and easy to set with a basic rivet gun. If you’re working with thick, dense wood like oak or walnut, or something super heavy like a workbench, go for steel rivets—they’re way stronger, just make sure they’re hot-dipped galvanized if they’re gonna be outside to prevent rust spots on your nice wood.
Next up, size. This is non-negotiable. A rivet that’s too small will pull right out, one that’s too big will split your wood. The general rule I live by (and teach all my customers who call me asking for advice) is: the rivet’s shaft diameter should be no more than 1/3 the thickness of the thinner wood piece you’re joining. So if you’re connecting a 1” thick shelf to a 3/4” thick bracket, you use a 1/4” diameter rivet. Easy enough, right? Also, the length is key. You want the rivet’s grip length to be just enough to go through both wood pieces, plus 1/8” sticking out the other side to form the rivet head. If it’s too long, the end will stick out awkwardly, and if it’s too short, you won’t have enough material to smash into the head and create a tight joint. Pro tip: If you’re working with stacked wood pieces (like a 2×4 on top of a 2×6), measure the total thickness, then add 1/8” to get the right grip length. I always tell folks to double-check their measurements because I’ve sent out a batch of wrong-length rivets before (my bad, that one was a user error on my end) and had to eat the cost—don’t be that guy who ruins a project over a tiny measurement mistake.
Now, the actual installation part. This is where so many newbies go wrong, especially drilling the right hole. You can’t just hammer a rivet into a pre-drilled hole, that’s how you split wood. First step: mark where your rivet is gonna go. Don’t just eye it—use a square or a ruler to make sure it’s centered, especially for joinery like a mortise and tenon or a butt joint. For end grain (that’s the cut edge of a board, like the end of a 2×4), you need a slightly smaller drill bit than the rivet’s shaft? Wait no—wait, correction: for side grain (the flat, long part of a board, where the wood grain runs parallel to the joint), use a drill bit that’s exactly the same diameter as your rivet’s shaft. For end grain, use a drill bit that’s 1/64” smaller. Why? End grain is way more porous and prone to splitting, so a slightly smaller hole keeps the rivet tight without forcing the wood apart. That’s a trick I learned from a contractor customer years ago—saved him so many headaches.
Drill depth matters too. You want the hole to go all the way through the top wood piece, and about 1/4” into the bottom piece. Not all the way through, not just a tiny sliver. If you drill too deep, you’ll weaken the bottom wood, if not deep enough, the rivet won’t have anything to grip onto. Once the hole’s drilled, gently tap the rivet’s shank into the hole with a rubber mallet—don’t use a steel hammer, that’ll mess up the rivet head and maybe dent your wood. Now, here’s the part that makes or breaks the joint: setting the rivet. If you’re using a blind rivet (the most common type for wood, especially for one-sided access—like if you’re attaching a bracket to the back of a shelf and can’t get to the other side), just squeeze the rivet gun until the stem snaps off. But if you’re using a solid rivet (for heavy-duty jobs, both sides accessible), you’ll need a rivet set (that’s the tool with the concave end to hold the rivet head) and a ball peen hammer. Place the rivet set on the factory head of the rivet, hold it tight, then hammer the other end (the tail) evenly, rotating the rivet a quarter turn every 2-3 hits. That way, the tail smashes out into a solid, rounded head that’s tight against the wood. If you just hammer it straight, the head will be lopsided and the joint will be weak.
Wait, let’s talk about avoiding common mistakes because I see these all the time. First, don’t use rivets to join wood that needs to flex, like a chair rung that moves when you sit. Rivets are great for rigid, static joints, but they don’t give at all—so a joint that shifts will crack the wood or loosen the rivet. Second, don’t skip pre-drilling. I know, I know, it’s an extra step, but hammering a rivet without a hole is how you split a nice piece of oak and end up with a ruined project. Third, watch your spacing. Don’t put rivets too close to the edge of the wood. The general rule is at least 3x the rivet’s diameter from the edge. So a 1/4” rivet needs to be 3/4” away from the edge. If you put it too close, the wood will split. I once got a panicked call from a girl who built a birdhouse and her rivet split the front panel—turns out she put the rivet 1/4” from the edge. Oops, that’s exactly the mistake I’m talking about.
Also, humidity is a big one for wood, and it affects rivet joints. Wood swells when it’s humid and shrinks when it’s dry. If you use a super tight rivet joint that doesn’t leave any room for movement, when the wood shrinks, the rivet might pull a little, or the wood might crack around the hole. How to fix that? If you’re working with indoor wood that’s not gonna shift too much, a tight joint is fine. For outdoor wood that will go through big humidity changes, like a deck, leave a tiny gap (like 1/32”) between the wood pieces at the joint when you put the rivet in. That gives the wood room to move without putting stress on the rivet.
Let’s run through a quick example to make this real. Say you wanna build a small outdoor shed door, using 3/4” pine planks for the door, and attaching the door hinges (also wood, maybe?) with rivets. First, pick the right rivet: since it’s outdoor, galvanized steel is good. The thinner wood here is the door plank, so thickness is 3/4”, so rivet diameter should be 1/4”. Grip length: the hinge is 1/2” thick, so total thickness is 3/4” + 1/2” = 1.25”, plus 1/8”, so 1 3/8” grip length. Now, drill the hole: side grain, so use a 1/4” drill bit, go 1/4” into the door plank, all the way through the hinge. Space the rivet at least 3/4” from the edge. Tap the rivet in, set it with a rivet gun (blind rivets work here since you can get to both sides of the hinge). Done—your door hinge will hold way better than screws that strip or nails that bend when the door slams.
Wait, another thing: finishing. If you’re staining or painting your wood project, do it before you set the rivets? Or after? I say after, because the rivet will leave a tiny mark on the wood when you set it, and if you stain first, you might get stain on the rivet head. Also, if you’re using aluminum rivets, you can even prime and paint them to match your wood, so they blend in instead of sticking out like a sore thumb. Just sand the rivet head a little first so the paint sticks.
Now, I should mention when rivets aren’t the best choice. If you’re making a wooden toy for a toddler that might end up in their mouth? No, rivets are metal, way too much of a choking hazard. Go with screws that have rounded heads or glue for that. If you’re joining two pieces of end grain for a big load-bearing beam? Glue and bolts are better, rivets can slip in end grain over time. But for 90% of the wood projects you’ll actually do—shelves, chairs, cabinets, outdoor furniture, small structural joints—rivets are underrated champions.
As a rivet supplier, I talk to woodworkers every single day, and the number one complaint I hear about rivets is that people don’t use the right ones. They grab a tiny aluminum rivet meant for drywall and use it for a oak workbench, and wonder why it pulls out after a month. Or they skip drilling a hole and split their wood. That’s why I always tell folks to hit me up if you’re not sure—don’t guess, because a $5 bag of wrong rivets can ruin a $100 piece of wood.
If you’re ready to try rivets on your next project, make sure you have the right tools: a basic rivet gun (costs like $15 at any hardware store), a drill with the right bits, a rubber mallet, and a square for marking. No fancy stuff needed, you don’t need a big workshop—even a beginner can do this. I’ve seen 16-year-old kids build their first treehouse with rivets and it held up through a whole winter.
Wait, let’s wrap this up with a quick recap so you don’t forget anything: 1. Pick rivet material: aluminum for indoor/light outdoor, galvanized steel for heavy outdoor, stainless for marine. 2. Size it right: diameter ≤ 1/3 the thinner wood thickness, grip length = total wood thickness + 1/8”. 3. Drill the right hole: same diameter as rivet for side grain, 1/64” smaller for end grain, 1/4” deep into the bottom piece. 4. Space correctly: at least 3x rivet diameter from edges. 5. Set evenly: don’t hammer lopsided, rotate solid rivets as you set. 6. Account for wood movement: small gap for outdoor joints.
And hey, if you have questions, or need help picking the right rivets for your project, my team and I are here. Don’t waste time guessing or ruining your wood—hit us up to chat through your needs, we’ve got the stuff for every size wood job, from tiny birdhouses to big decks.
Screw References:
- Woodworking Network. (2022). Fastening Basics: Choosing the Right Hardware for Wood Joints.
- American National Standards Institute. (2019). Specifications for Blind Rivets for Wood Applications.
- Oak Woodwork Association. (2021). Humidity Effects on Wood Fastening Joints.
- Fastener Industry Association. (2020). Rivet Installation Guidelines for Woodworking Projects.
Wuyuan Jieyi Automotive Electrical Appliance Co., Ltd.
As one of the most professional rivet manufacturers and suppliers in China, we’re featured by quality products and good service. Please rest assured to wholesale bulk durable rivet in stock here from our factory. We also accept customized orders.
Address: No. 7 Likeng Road, Industrial Park Wuyuan County, Shangrao City, Jiangxi Province
E-mail: wyjydqz@163.com
WebSite: https://www.wyjydq.com/
